Case Study in Brief
Description
This was a hands-on creative workshop for children and early teens, aimed at imagining and prototyping a real-life snow-based city installation in Tallinn. Participants worked individually and in teams to design playful, functional snow structures using scaled models and diverse materials. Through role-based teamwork, they explored ideation, collaboration, and spatial thinking, supported by a dynamic creative environment. The process included inspiration, prototyping, presenting ideas, and navigating team dynamics, offering valuable lessons in empathy, creative freedom, and real-world problem-solving. Final models may influence an actual Snow City built from 10 truckloads of snow.
Dispatch From the Field
Objectives
- Generate a variety of ideas for a Snow City installation through model-making.
- Practice creative thinking and problem-solving in both individual and group settings.
- Develop skills in collaboration, spatial reasoning, and design communication.
- Encourage ownership and engagement by involving participants in a real-world city project.
Materials Needed
- Modeling clay
- Pre-cut foam plastic pieces (hexagon shapes)
- Cardboard tubes (2 per participant for individual task; more for group work)
- Paper knives, scissors, felt-tip pens
- Scaled human cutouts (1:20 – 180cm adult, 120cm child)
- Team contract templates (for defining group roles)
- Tables for model building (ideally 2 for group work + 1 for messy work)
- Videos of existing snow cities (optional, for inspiration)
- Display screen for visuals and instructions
Workshop Duration: 3–4 hours
Activity Flow
Introduction and Framing (20–30 min)
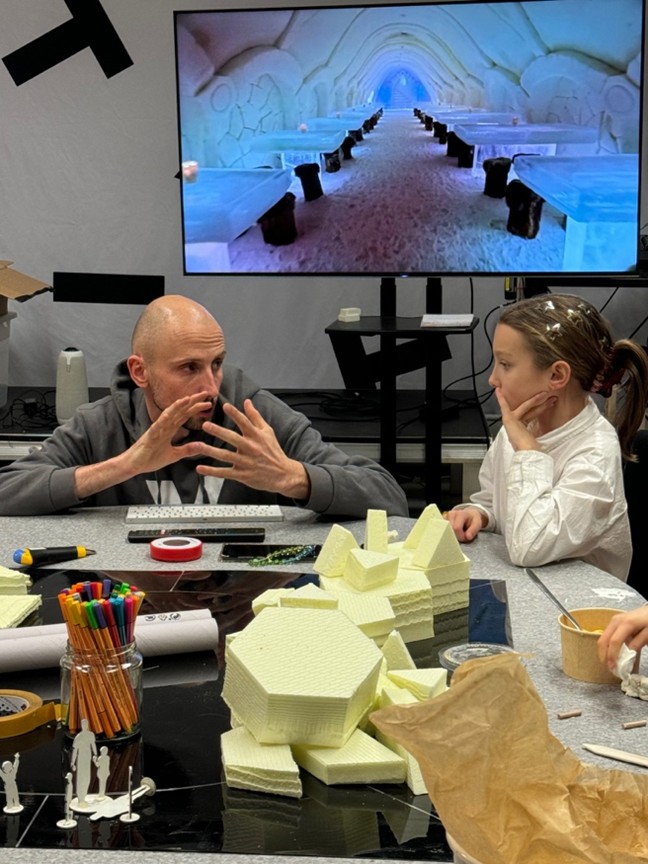
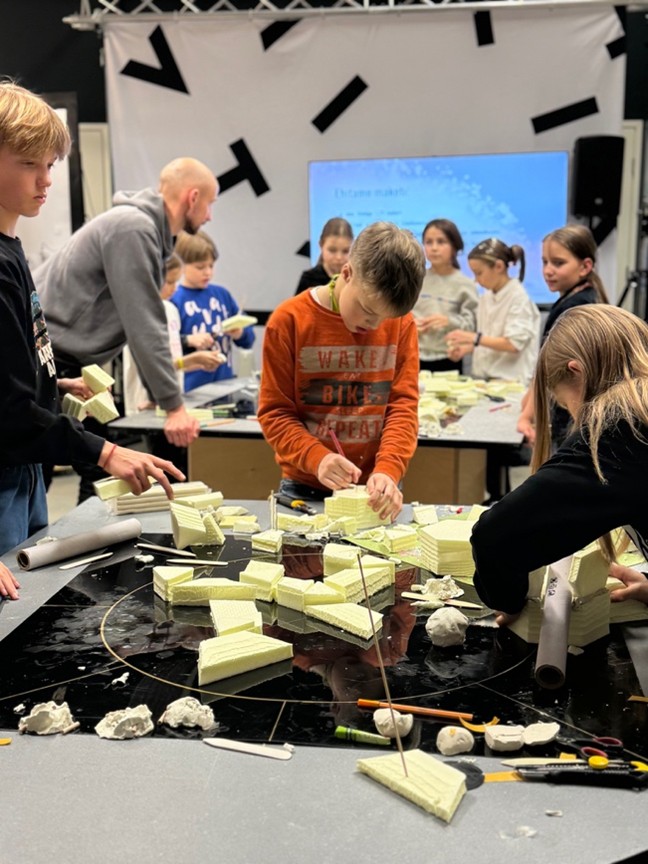
The workshop begins with a facilitator and a city representative explaining the concept of Snow City – where and how it will be built (10 truckloads of snow, large pipes, public play focus). The children are shown short inspirational videos of other snow cities worldwide to activate their imagination. The brief is simple: design structures where people – especially kids – can climb, slide, explore, and enjoy winter outdoors.
Individual Ideation Task (30–45 min)
Each participant receives materials to create a small-scale (1:200) model of a snow structure using clay and two cardboard tubes. They are instructed to focus on form and function (rather than decorative detail) and consider how children would move, climb, or slide on the structure. This task helps ensure everyone has a voice and brings their vision into the process.
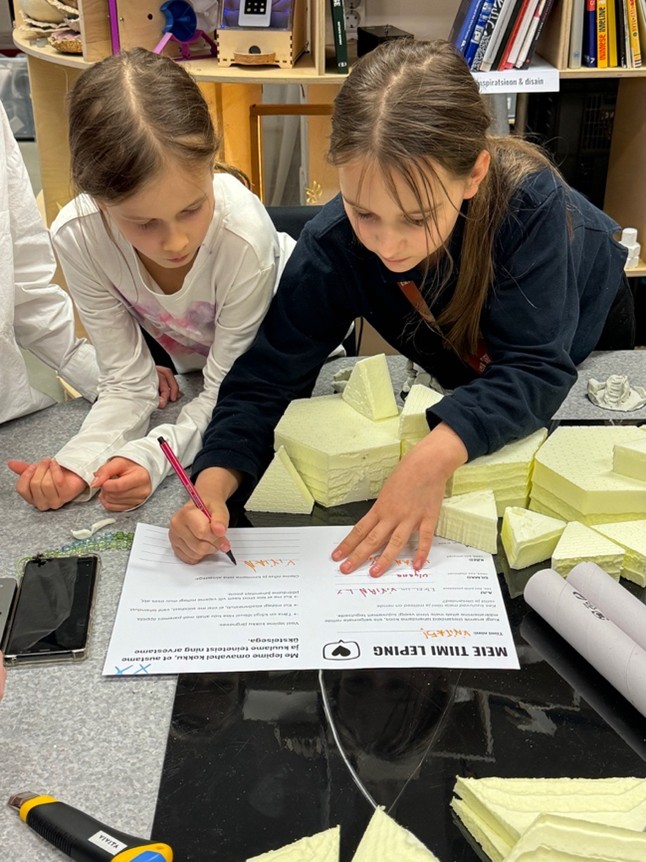
Group Formation and Role Assignment (15 min)
Participants form two self-selected teams. Each team fills out a “team contract” and assigns roles:
- The Brain – leads overall concept and direction
- The Eyes – oversees visual design
- The Hands – builds the final prototype
- The Heart – ensures team wellbeing and inclusion
Roles are explained with empathy-based framing to foster mutual support and understanding.
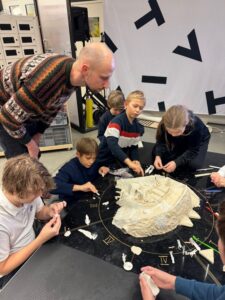
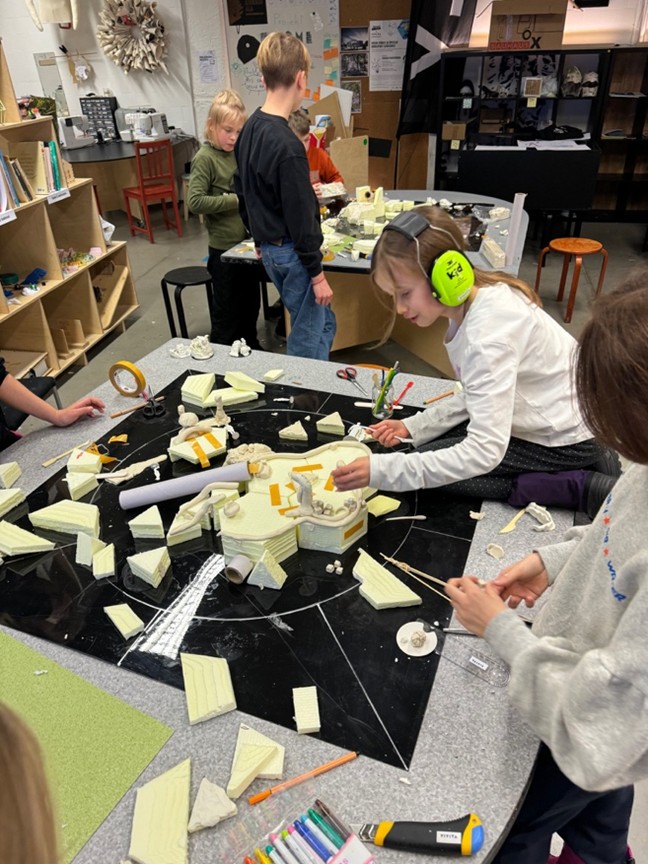
Collaborative Design and Prototyping (60–90 min)
Teams review each individual model and decide collectively which design to scale up. They align on a common vision or theme and begin creating a 1:20 scale prototype using additional materials. Human cutouts are used to evaluate accessibility, safety, and playability. Instructors guide from the background, encouraging ownership and resolving conflicts calmly when needed.
Presentation and Documentation (30 min)
Each team presents their prototype and explains the concept, structure, and how it serves the intended users. Presentations are filmed for documentation and future use in Snow City planning. Teams reflect on their collaboration and share highlights of their process.
Space and Setup
The activity is held in a modular, child-friendly makerspace equipped with craft and prototyping tools. Separate tables are provided for teams and messy work, and noise-reducing options (headphones, music) are available. The space supports both focused making and informal exploration. Clear visual instructions and safety infographics help kids navigate independently.
Facilitation Tips
- Introduce team roles with relatable, emotional framing.
- De-emphasize competition; encourage working toward a shared real-world goal.
- Monitor group dynamics and adjust space or timing if conflicts arise.
- Keep energy balanced by allowing breaks and offering other creative tasks when needed.
This activity blends imagination with tangible design and gives children a sense of agency in shaping their city’s winter landscape—making it a powerful entry into urban design, teamwork, and creative prototyping.
Practical Details – Facilitator’s Notes
How did you modify the activity?
No major changes in duration compared to the parent activity.
How did you organize the space?
The space was organised to support creative, hands-on group work and flexible movement. Two main tables were set up for the group prototyping tasks, and an additional table was designated for “messy” work like cutting and painting. Materials and tools were sorted in labeled boxes with playful acronyms (e.g. BOAT – Box of All Things) to help kids find and return items easily. A screen displayed workshop instructions and inspiration videos. The open, well-lit space allowed for free movement and informal breaks. Modular furniture on wheels enabled quick reconfiguration, but separate team tables sometimes created unnecessary competition. Noise-cancelling headphones and background music helped with focus, though the space lacked a quiet area for overstimulated participants.
Who did you work with?
We worked with a group of youth aged 9–13 who are members of the VIVITA creativity accelerator (Vivinauts). These young makers regularly visit the open-plan makerspace after school to experiment, build, and socialise. They joined this workshop to take part in a guided design activity with real-world impact. Some came with a strong interest in creating things; others were curious or looking for inspiration. The group was mixed in gender and motivation but shared a common interest in hands-on exploration. The workshop also engaged the City of Tallinn, which commissioned the youth to design a Snow City as a participatory public space initiative.
What resources did you use?
We used a range of hands-on materials to support ideation and prototyping: modeling clay, foam plastic (hexagon shapes), cardboard tubes, scissors, paper knives, and felt-tip pens. Scaled human figures (1:20) helped participants evaluate the functionality and safety of their designs. The workshop took place in the VIVITA makerspace, which provided access to modular furniture, an open kitchen, and professional creative tools (e.g. laser cutter, 3D printer). Instructional screens, inspirational videos, and labeled toolboxes supported independent learning. The flexible space encouraged experimentation, teamwork, and creativity in a supportive, resource-rich environment not usually accessible to youth elsewhere.
What did you learn?
We learned that while role-based teamwork can encourage responsibility and collaboration, the roles need to be introduced with more clarity and emotional relevance to help participants empathise with each other and make shared decisions. We also observed that separating teams spatially led to unintended competition, which created stress and hindered creativity. A more collaborative setup and framing the activity as a shared goal rather than a contest would help. Additionally, the lack of a calm retreat space made it harder for some kids, especially those feeling overstimulated, to recharge. Balancing structure with freedom and offering flexible participation proved essential.