
Case Study in Brief
Description
This was a hands-on design workshop where children aged 9-13 collaboratively built a final model for a Snow City to be constructed in Tallinn. Working in small teams, participants each designed a section of the city using modeling clay and scaled human figures, focusing on functionality, safety, and creativity. The model was placed on a low platform to allow comfortable, inclusive collaboration. Facilitators guided the process while encouraging autonomy. The workshop promoted teamwork, spatial reasoning, and real-world problem-solving, empowering youth to shape a playful, public winter space through participatory design.
Dispatch From the Field
Objectives
- Develop and finalise a shared prototype for the Snow City based on earlier ideation.
- Practice collaborative design, critical thinking, and spatial reasoning in a real-world context.
- Apply feedback from previous sessions to improve team dynamics and space use.
- Ensure the design is imaginative, functional, and safe for public use.
Activity Flow
Introduction and Framing (15–20 min)
Facilitators welcome participants and introduce the goal: to build one cohesive prototype of the Snow City that will be constructed next week. They explain the division of the model into four sectors and remind the group of important criteria such as safety, durability, fun, and aesthetic coherence. Inspirational videos of real snow cities are shown to provide visual context and spark ideas.
Group Formation and Sector Assignment (10–15 min)
Participants choose their own teams and are each assigned a sector of the Snow City to design. Teams are encouraged to define their own working styles and share ideas, with flexibility for individual contribution where needed.
Collaborative Model Building (90–120 min)
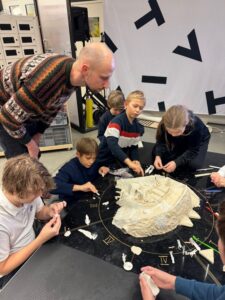
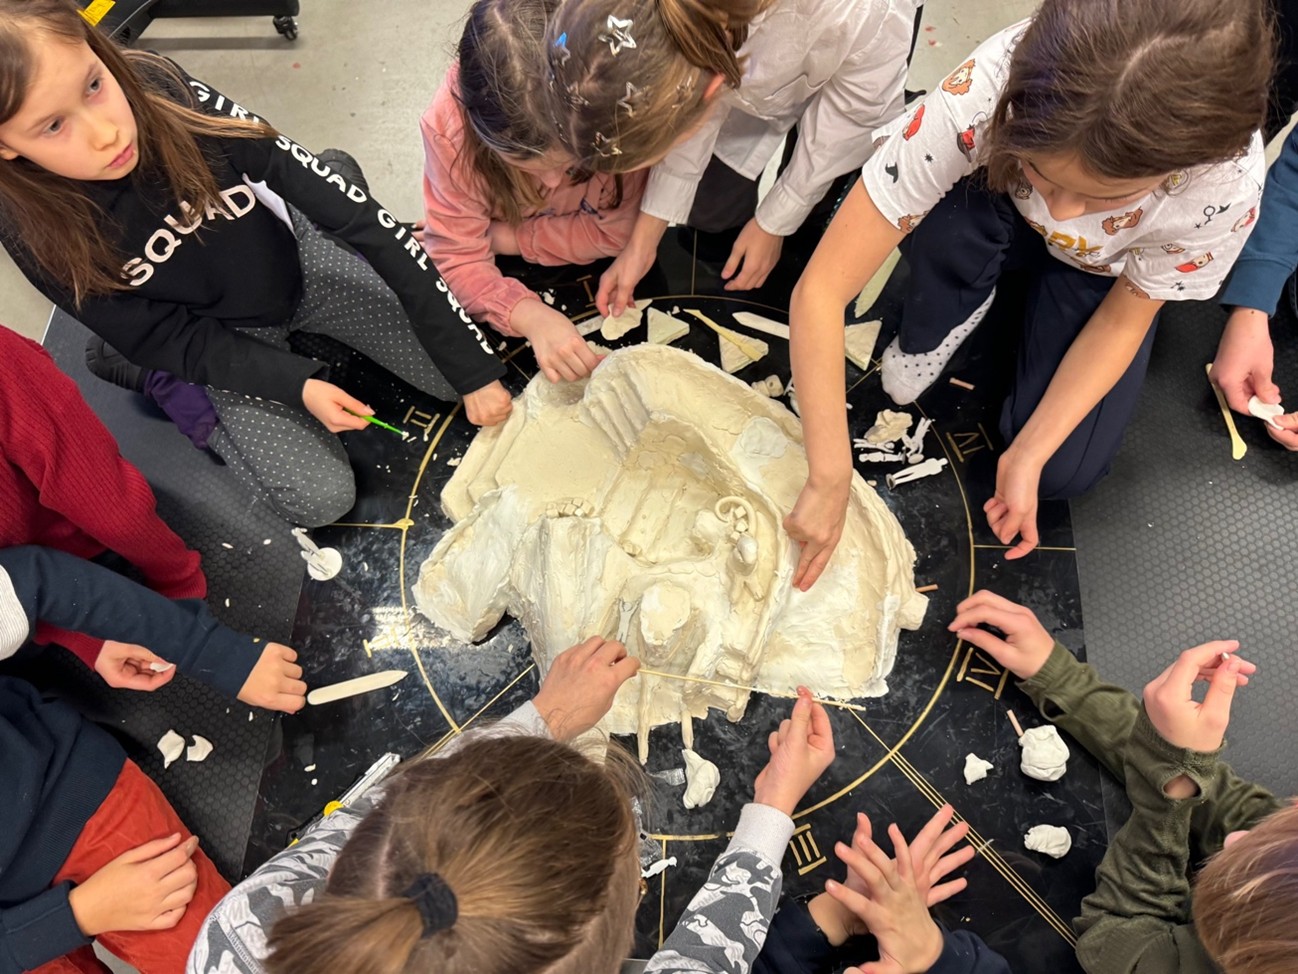
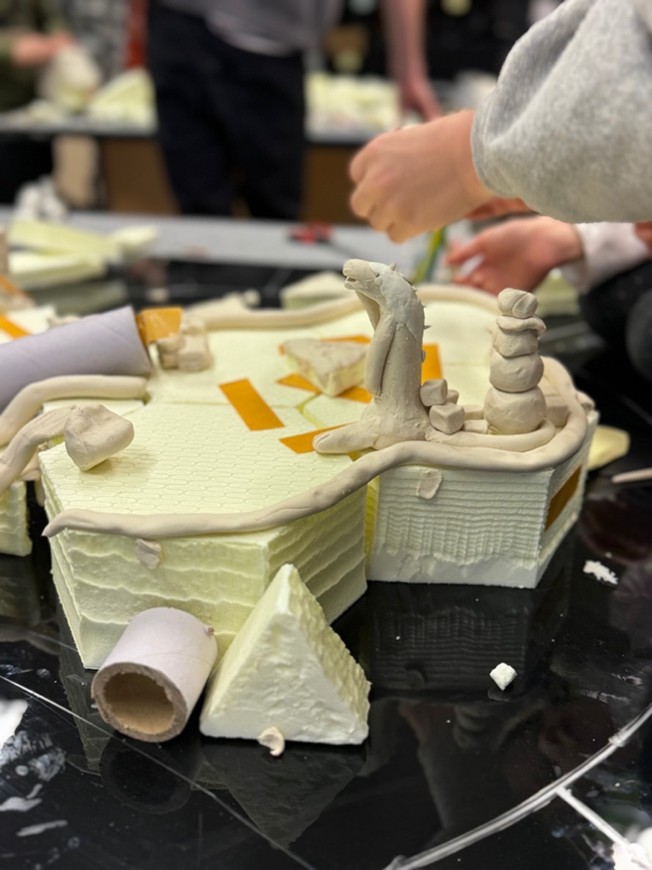
All teams work simultaneously on a shared prototype model, placed on a low platform to enable everyone to sit or kneel around it comfortably. This setting improves group dynamics and ensures inclusivity. Each team adds to the structure with features like sculptures, slides, or tunnels. Facilitators circulate to support progress, check safety and feasibility, and give design feedback. Some children work on focused elements (e.g., sculpting), while others contribute to the larger structure or take creative breaks nearby.
Feedback and Presentation (20–30 min)
After completing their sections, each group presents what they have added, explaining how it contributes to the functionality and atmosphere of the Snow City. The entire group reflects on how well the sectors fit together and how the final design serves the intended users (children and families).
Space Evaluation (10–15 min)
Participants are given evaluation stickers and invited to mark areas in the room that made them feel positive or negative. This provides quick feedback on the workshop environment in a way that’s more accessible and engaging than traditional surveys, especially when participants are tired after school.
Space and Setup
The makerspace is reorganised from the previous session: tables are pushed together and a low platform is added to the center, becoming the shared work surface. Pillows are provided for floor seating, making the setup more accessible and equal. Tools and materials are stored nearby for easy access. A screen displays instructions and video examples. Music plays to muffle distractions, but the space can be overstimulating at times. While there is no formal quiet zone, participants are free to take breaks or step aside if needed. Cookies are offered mid-session to maintain energy and reduce frustration.
Facilitation Tips
- Prepare the model and platform in advance to create a unified starting point.
- Proactively adapt space based on participants’ physical comfort and group dynamics.
- Focus on collaboration over competition by assigning shared ownership of the final design.
- Provide consistent, gentle feedback to support decision-making and build confidence.
- Use sensory tools (music, snacks) to manage energy levels and focus.
- Offer individual tasks (e.g., sculpting) to include those who need more focused or solo work.
This activity blends imagination with tangible design and gives children a sense of agency in shaping their city’s winter landscape making it a powerful entry into urban design, teamwork, and creative prototyping.
Practical Details – Facilitator’s Notes
How did you modify the activity?
No major changes in duration compared to the parent activity.
Workshop Duration: 3–4 hours
How did you organize the space?
The space was reconfigured to promote inclusion, collaboration, and comfort. Instead of separate tables (used in the previous workshop), facilitators pushed the tables together and placed a low platform in the center for the shared model. Kids could sit on or around it, which helped balance physical comfort and encouraged participation, especially for taller kids who had felt awkward standing. Tools and materials were placed nearby for easy access. The setup allowed flexible movement, and those needing breaks or more quiet could step aside while still observing the activity. Music helped soften environmental noise, and cookies were provided to maintain energy and morale.
Who did you work with?
We worked with a group of seven youth aged 9-13, including both boys and girls, all of whom are part of the VIVITA creativity accelerator. These participants regularly use the makerspace as an after-school activity to create their own projects or socialise with peers. They signed up for this workshop to contribute to a real-world project. Each participant brought different strengths: some were hands-on builders, others more focused on thinking or visualising and the activity gave them space to choose their roles within the team. The workshop was also connected to an artistic institution and supported by the City of Tallinn.
What resources did you use?
The workshop used modeling clay, cardboard tubes, and 1:20 scaled human figures to help visualize and prototype the final Snow City model. The unified model was placed on a lowered central platform so participants could sit around it and work from different angles. The space provided modular furniture, pillows, video inspiration, prototyping tools, and access to sensory elements like music and the smell of baked cookies. Facilitators brought in real-life scaling references and safety considerations. Participants used evaluation stickers to reflect on the space and their experience in an accessible and engaging way.
Materials Needed
- Modeling clay
- Cardboard tubes
- Scaled human cutouts (1:20 – 180cm adult, 120cm child)
- Platform (sitting height) for model placement
- Cushions or pillows for floor seating
- Sculpting tools
- Display screen for videos and instructions
- Evaluation stickers (for space reflection)
- Music system (optional, for ambient focus)
- Freshly baked cookies (for energy and comfort)
What did you learn?
We learned that merging all ideas into a single collaborative prototype, rather than having competing group models, created a more supportive and inclusive dynamic. Adjusting the space to meet physical and emotional needs such as providing a sitting-height platform or allowing breaks helped maintain engagement. Participants valued having autonomy but still relied on facilitator guidance, highlighting the importance of trusted adult mentors. Evaluation using stickers was more successful than previous methods, likely due to reduced stress and a simpler format. Overall, we saw that small environmental or structural changes can greatly impact collaboration, focus, and enjoyment.